- Walkthrough
- Collectibles
- Trophies
Walkthrough
Chapter 3: Homecoming
- 4 Treasures
- 3 Photo Opportunities
- 1 Lock Box
[2 Cinematics]
Jump down to the left to get down to the log bridge that Nadine has just crossed, of course it is destroyed as soon as you land next to it. So the thing to do is jump down to the right onto a muddy slope. At the bottom walk to the edge and use your rope by pressing L1 to grab onto a tree branch on the other side. Much like in Uncharted 4 you'll see these spots throughout the game marked by the white rope wrapped around them. Once attached jump off the edge and then start climbing up the rope a little until you've got feet on the wall, then you can run left and right to build enough speed to jump to a ledge on the left below Nadine. Climb up and around to her.
Time to start driving, get in the car and go forwards up the muddy slope. Follow the river along and drive straight up the waterfall. Keep following the river along until you reach a lip where you see a flock of flamingos gathered where you should stop and get out of the car for a moment.
Photo Opportunity 4/28 - Flamingos
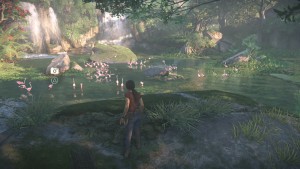
Take a photo of the flamingos before you drive into their pool and scare them off.
Get back in the car and drive over the edge, you'll scare them all off.
Treasure 8/68 - Gupta Empire Coins
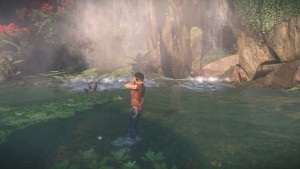
In the water in front of the waterfall, between the waterfalls and the big rock.
Back in the car again and drive through the left waterfall to a path behind it. Keep following the path as it curves to the left and you'll reach a steep muddy slope to drive down (you can't go back once you do) to your first Hoysala ruins. Drive close to the doors but leave a bit of a gap in front of the car when you stop. Approach the door.
[Cinematic]
Drop back to the car to grab the winch and then carry it back to the door to hook around it. Don't worry about the two enemies that Nadine is fighting, she can take care of them. Instead worry about the three enemies above, most importantly the one on the right who might decide to throw a grenade at you. Once you've taken him out shoot the one at the top while he's distracted shooting at Nadine and then finally shoot the one that Nadine is struggling with. As long as you don't stick your head out the whole time it should be quite safe to line up some easy headshots.
Grab yourself some ammo and a new gun from the deceased enemies. If you climb up to the very top you can get a couple of grenades too.
Treasure 9/68 - Silver Water Jar
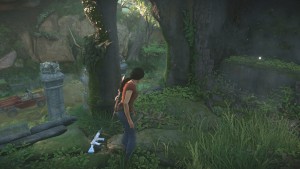
And with one of those grenades you can blow up the fragile looking wall here, I'd recommend throwing it through the gap at the top of the wall so it explodes on the other side safely.
Get back into the car and put it into reverse to pull down the ancient gate, handily forming a ramp to drive up. Follow the river along again until you reach a pair of waterfalls.
Treasure 10/68 - Golden Fish Statuette
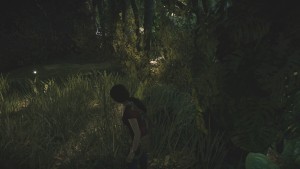
Found hidden behind some foliage between the two waterfalls on the right.
Drive past the second waterfall and then to the left over where you just tore the door down and through a cave filled with bats. Drive up the muddy slope on the other side, use the rocks if you're struggling, and you'll reach another set of ruins. This time already filled with enemies.
[Cinematic]
Outskirt Ruins
As with pretty much all of the encounters in the game there are many different approaches to how you can handle the fight but you will have to defeat all of the enemies before you can move on. Whether you do that stealthily or just start shooting from the off is up to you. On lower difficulty levels you have the ability to tag enemies by aiming at them and pressing the L3 button, this adds a pointer that floats above them so you can always see where they are. Obviously this is a quite powerful ability so it's not possible to turn it on in Crushing mode. Other than that the difficulty also changes the reaction time for enemies seeing you. In lower difficulties you'll get a triangular icon above them showing that they're spotting you giving you time to dive back into cover but in Crushing they'll just immediately see you.
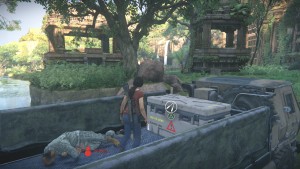
If you favour stealth there's an enemy standing in a truck on the back right side of the area that you can sneak up on, just be careful of the enemy patrolling on the area above the ramp up to it. The lock box on his truck has a Silenced Pistol inside that could help (also worth noting that higher difficulties equals less ammo).
There's a sniper up on top of the gate that you might have trouble spotting if you're being sneaky along the right side of the area.
Photo Opportunity 5/28 - Outskirt Ruins
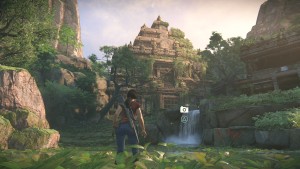
Once all of the enemies are dead you'll find this spot in the water looking up at the ruins, halfway between the two waterfall sets along the left.
 |
#nofilter |
|---|---|
| Take a photo at 5 photo opportunities |
Climb up the gate of the main part of the ruins to a circular crank on top, turn it to open the gate for Nadine to drive through. Quickly run through the doors up top that opened too.
Jump to the circular patterned wall and start dropping down to land in the jeep.
Treasure 11/68 - Mango Crystal Scent Flask
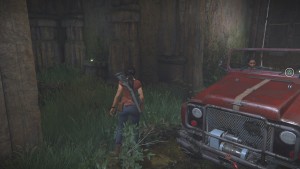
Immediately get out of the jeep to go find the treasure on a stone table to the right.
Hop back into the car and drive forwards out of the ruins and up the ramp into the next chapter.
